| 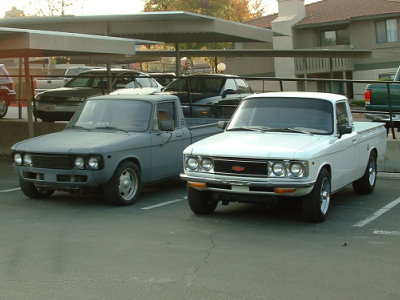
On the left: 76 Chevy LUV (factory disc brakes)
On the right: 75 Chevy LUV (factory drum brakes)
Aside from some cosmetic changes, the '75 and '76 are similar in stock form. But get behind the wheel of each, and you'll notice a big difference in stopping power. Although the stock drum brakes are among the best drum brakes I have used, they simply aren't as good as the discs for consistent all-weather-stopping and ease of maintenance. For those of you with engine upgrades, disc brakes up front are even more important.
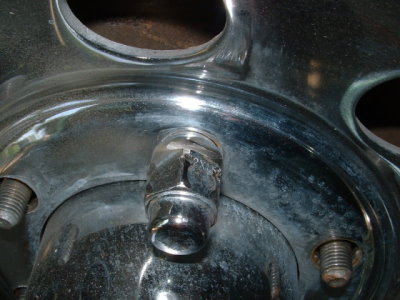
Stuck Lug Nut
First we raise the front and support it securely with jack stands, chock the rear tires, and then remove the front tires. Hopefully you don't get in the situation that I did and find out that someone cross-threaded your lug nut for you. After exhausting all other options, I had to cut the nut off with a die-grinder. One hour later, I was finally able to remove the tire.
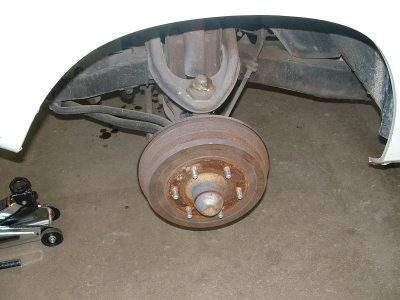
Final View of Stock Drums
At this point you can choose to leave the spindles on the truck and just replace the brake parts, or do like I did and replace the whole spindle. I chose to replace the entire spindle because I couldn't remove my brake drums. They were grooved so badly that the shoes were holding them on and they were rusted to the hubs.
To remove the whole spindle: Disconnect the upper and lower ball joints, the outer tie-rod ends, and the brake lines.
To change the brake parts and leave the spindles: Remove the drums, the brakes and brake hardware, the hub and bearings, the backing plate, and the brake lines.
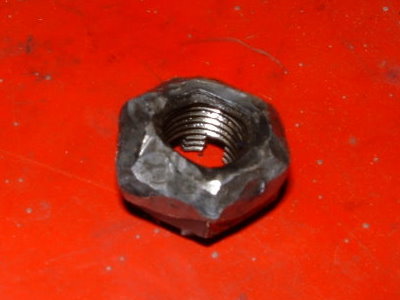
Damaged Castle Nut
Unfortunately, removing ball joints that have been installed for years, can be challenging. After unsuccessful attempts using normal methods of removal, I had to resort to more drastic measures. I decided to sacrifice this castle nut in lieu of damaging the threads on the ball joint studs. I threaded it upside down onto the threads and began the "persuasion" phase.
Note: Finding a replacement metric castle nut was very difficult. After many days of searching, just when I thought I was going to have to buy a new ball joint just to get the nut, I found metric castle nuts at McMaster Carr. Don't waste your time looking at all the usual hardware or automotive chain-stores. Trust me, no one has them.
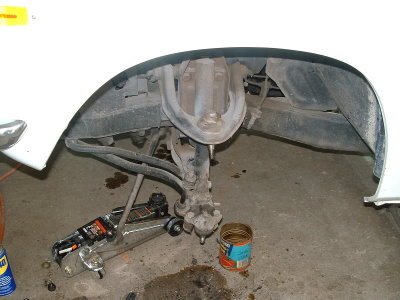
Spindle Removed
After lots of prying, pounding, kicking, and cursing, I finally got to this point. Things that have been on for 30 years, don't want to come off!

On the left: 75 Chevy LUV Factory Drum Brakes
On the right: 76-80 Chevy LUV Factory Disc Brakes
As you can see, the spindles are identical, sharing the same bolt pattern for the brake parts. Again, for some of you, leaving the spindles on the truck and simply swapping the drum brake backing plate for the disc brake caliper bracket may be easier. My "donor" parts were pulled from a truck in a wrecking yard but I don't know what year it was. I assume '76 thru '80 are the same.
At this point I completely disassembled the disc brake spindles and washed everything in parts cleaner. The wheel bearings were inspected and seemed OK. The rotors had large grooves in them so I took them to be turned. However, none of the repair shops would turn the rotors claiming that they were under the minimum thickness. New rotors were about $100 each. Since I wasn't even sure if this was going to work, I decided to use the rotors as-is and buy new ones later.
After a good cleaning, the hardware was given a quick coat of black spray paint. If you get any paint on the bearing races, clean it off with paint thinner. You should also not paint any part of the mating surface where the caliper and caliper bracket slide together. The wheel bearings were re-packed with disc-brake-compliant grease and everything was reassembled. Any repair manual will give you instructions on how to do this if you need help.

'76 Front Brake Hose from NAPA
Before starting this project I ordered new brake pads, rebuilt calipers, new brake lines, and a rebuilt master-cylinder for a '76 Chevy LUV from NAPA Auto parts. Everything seemed correct except for the brake lines.
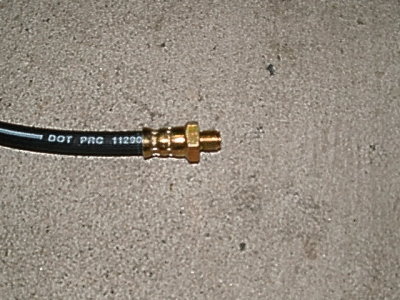
Wrong End
One end was useless and didn't attach to the caliper. This started a quest for the correct lines that sparked some debate on LUVTruck.com. I looked at a few other trucks in the wrecking yards but they were either drum or missing the front brakes. NAPA tried to tell me over and over that the lines were correct. Even Rock Auto.com seemed to list the same incorrect lines for the 76-80 disc brake trucks.
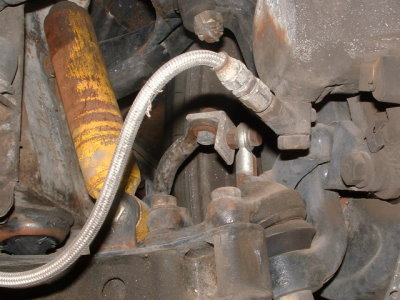
Custom Brake Lines for '76
I had my '76 as a reference which was equipped with disc brakes from the factory, but I had installed custom brake lines long ago and I was unsure about what part of the line was stock and what part was aftermarket.
To this day, I'm still unsure if I was missing a part, or if I was sold the wrong lines.
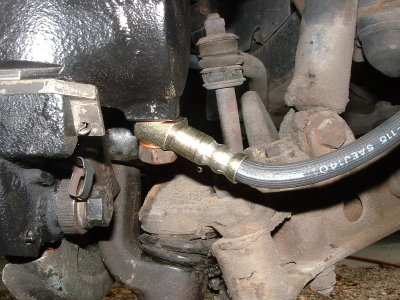
Custom Inexpensive Brake Lines
Eventually I got tired of the problem and went to a custom brake shop. In 10 minutes I had two inexpensive custom brake lines with the correct ends. If you go this route, be sure to tell them that the end that attaches to the truck frame uses metric threads and take them a caliper to match up a "banjo" to. I wish I had simply gone to the brake shop in the first place.
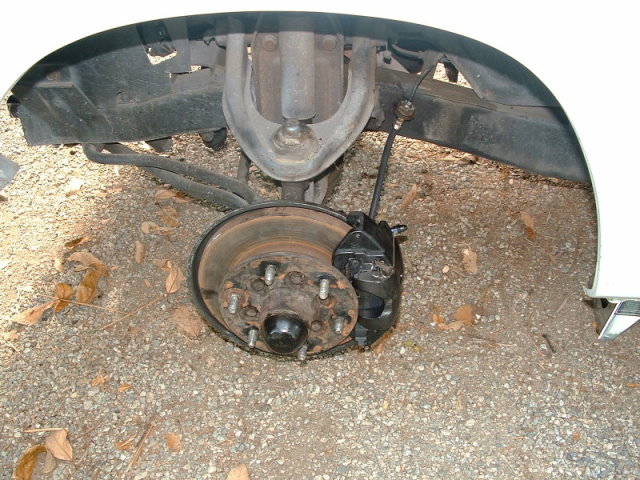
Disc Brakes Installed
Here is the completed assembly. Originally I had planned to do the swap on a Sunday, but with all of the complications, the project ended up taking a full week to complete during nights and weekends. Still, I think it was worth the effort.
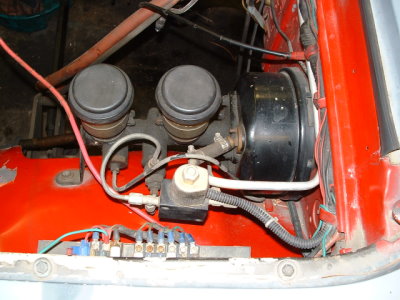
Master Cylinder
Externally, I couldn't tell the difference between the master cylinders for my '75 and my '76. But the experts at Karp's Brake Service in Upland, CA assured me that there was some internal differences that could not be ignored when changing to discs. The master cylinder was a direct bolt-on replacement in my case. Neither my '75 nor my '76 have any kind of proportioning valve. Some trucks have them and some do not. I have also seen several different types of master cylinders out there so you may be in uncharted territory with your master cylinder. If you get stuck, the best advice I can give is to look up a local brake shop for help or give Karp's Brake Service a call.
Test Drive
During the initial drive around the block, the system worked well, but was slightly disappointing compared to my '76 that came with disc brakes from the factory. I assumed that using the old rotors was hurting my setup and dismissed it; hoping things would improve.
Over the next couple weeks they did improve, but a new problem arose. During heavy braking the right front brake would stick. Then it would cause the vehicle to pull to the right and the rotor to overheat. I pulled the tire off and disassembled the entire caliper slider mechanism. I cleaned and greased everything and reassembled it all. I took it on a test drive and it still had the same problem. Doh!
I began to assume that I was going to have to replace or rebuild the caliper. But after a few more weeks, the problem seemed to go away on it's own. Now the truck stops great and the caliper doesn't hang any more. Somehow the piston must have been hanging up in the caliper, but I'm not sure why. People have reported sticking calipers, even on newly rebuilt units, so I'm assuming that's what happened to me.
I hope this article helps you with your swap. If you have suggestions, questions, or improvements, feel free to post them in our forums. If anyone goes the route of changing the brake parts and leaving the spindles on the truck, take some pictures and send 'em in so we can improve this article.
Back |